
Add employee sits in the top-right of All Employees. It opens a single panel that slides in from the right — not a multi-step wizard, so you can see everything you are about to commit to at once.
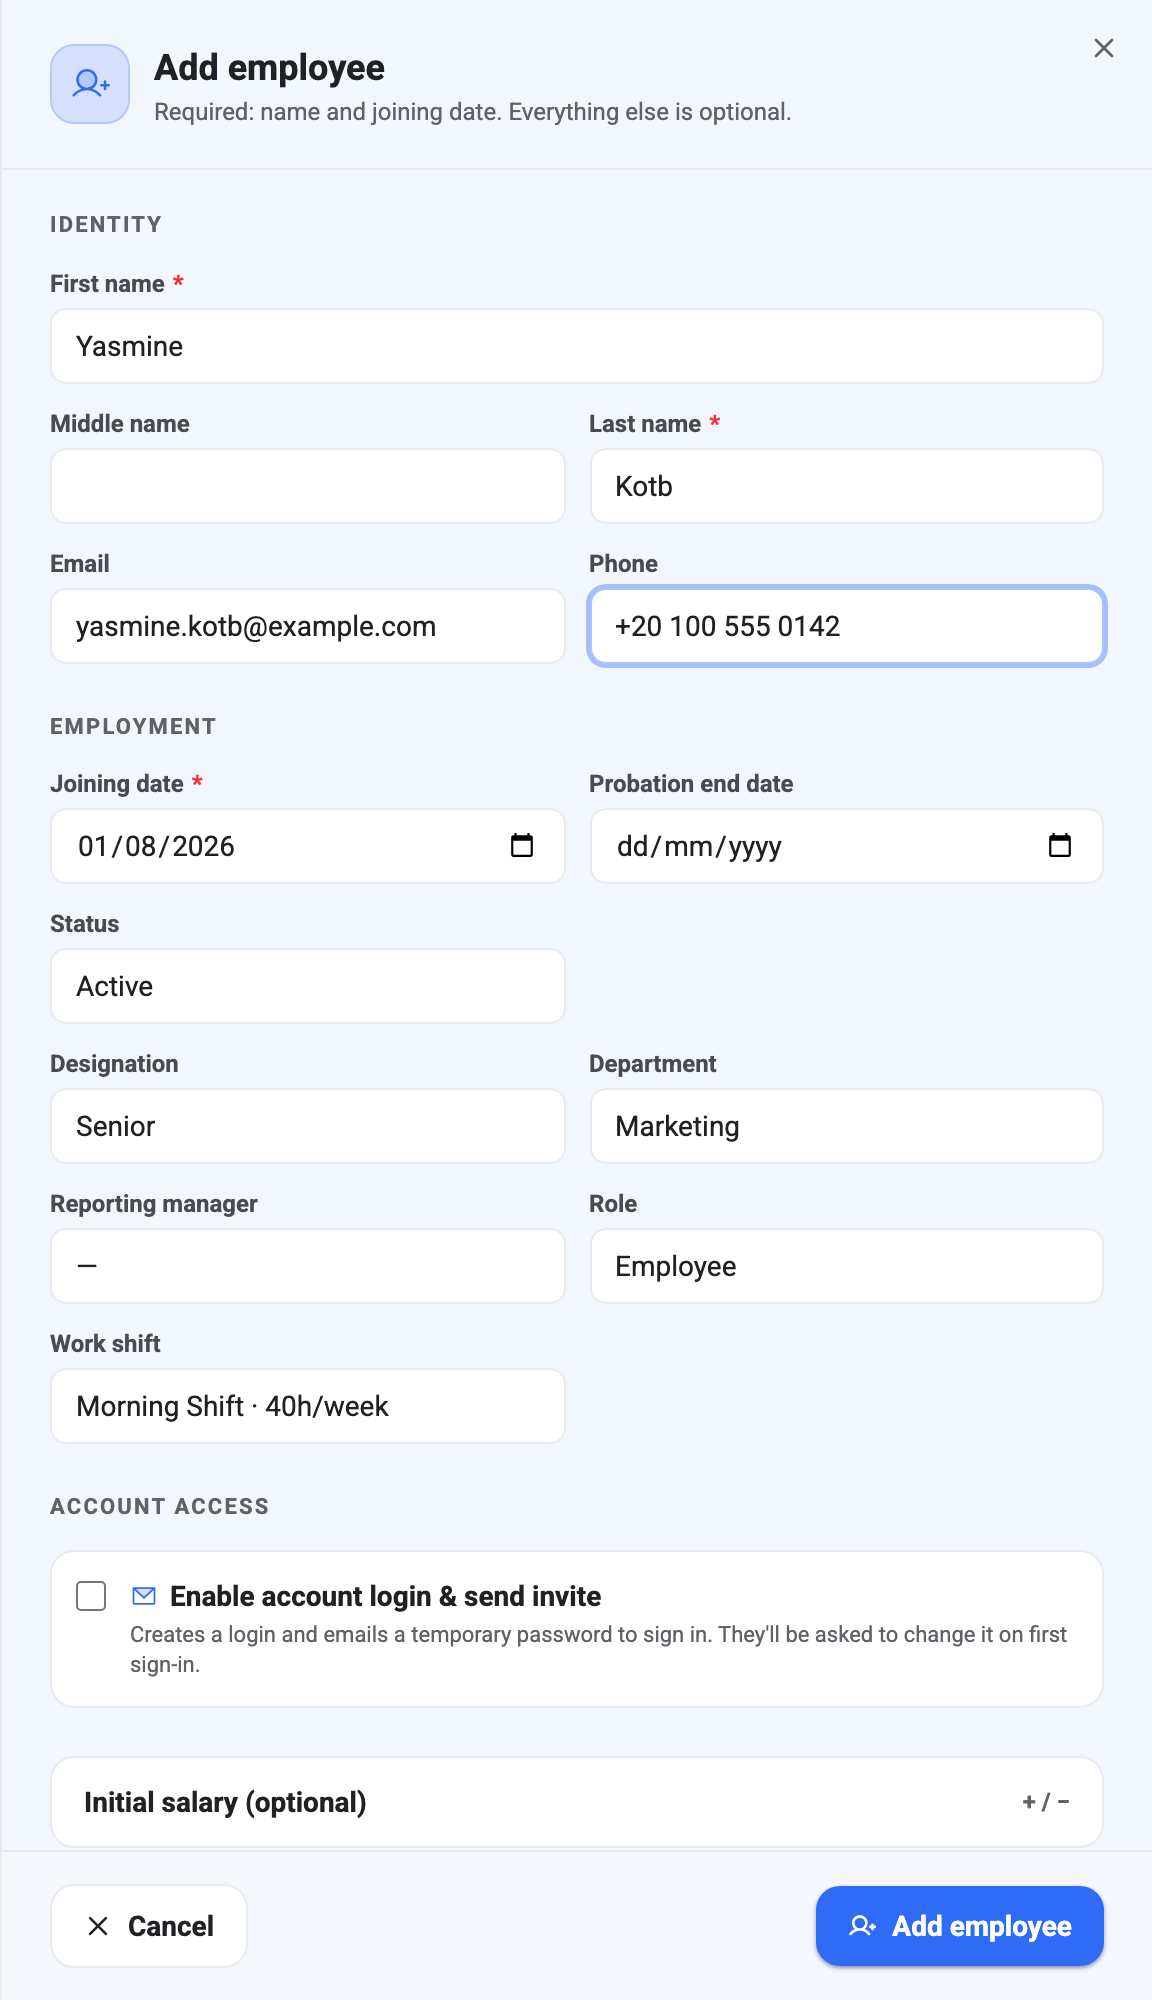
Only three fields are actually required
First name, last name, and joining date. You can save on those alone and fill in the rest whenever the paperwork catches up — nothing later in BeeHR is blocked by a half-filled record.
The joining date is the one to get right, though, because it is not just a date on a profile. It is the date the person’s first salary record is dated from, the date their work shift starts applying, and the point from which attendance expects to see them. It defaults to today, which is correct for somebody starting this morning and wrong for somebody you are entering three weeks late. Backdate it and everything downstream lines up on its own.
You never type an employee code. BeeHR generates one — HR-EMP-2026-00012
— when you save, and it stays with that person permanently.
The employment choices
Status starts on Active. Pick Probation if that is how they are starting, and set a probation end date so you have something to filter and report on later; nothing happens automatically on that date, it is a marker.
Designation and Department are picked from your own lists rather than typed, which is what makes them reliable to filter on later. If the one you want isn’t there, add it under Designations or Departments first — they are quick to add, and the dropdown here picks it up straight away.
Reporting manager is anyone already on the roster. It is what routes this person’s requests to the right approver, so it is worth setting even when the org chart is obvious to you.
Work shift deserves a moment. Choosing one here doesn’t just tag the record — it writes a shift assignment dated to the joining date. That means if you add somebody in August who started in June, their June and July attendance is still judged against the hours they actually worked, not against whatever shift you happen to move them to next year. Shifts live in Work Shifts; if you haven’t set any up, the dropdown is empty and disabled, which is fine.
Role is permissions, not a job title
Designation is what they do. Role is what they are allowed to see and do inside BeeHR, and the two have nothing to do with each other — a Director can sit on the plain Employee role, and a junior coordinator can hold Admin.
Two guardrails apply here:
- Owner isn’t in the list. There is exactly one owner per account and the role can’t be handed out from this form.
- You can’t grant more than you hold. Creating somebody with an admin-level role requires that you are an admin yourself, and more generally BeeHR refuses to let you assign permissions beyond your own. If a role you expected is missing from the dropdown, that is usually why.
Roles and Access is where the roles themselves are built.
Adding someone is not the same as giving them a login
This is the single most common surprise on this screen. Saving the form creates a record. It does not create an account, send anything, or let that person sign in to the phone app.
Enable account login & send invite is what does that: BeeHR provisions the login and emails a temporary password, which they are asked to replace the first time they sign in. The checkbox stays greyed out until you have typed an email address above it — there is nowhere to send an invite otherwise.
You do not have to decide now. If you leave it unticked, Invite to app is waiting in the ⋮ menu on their row in All Employees whenever you’re ready. And if the invite email itself fails for some reason, the employee is still created — you’ll see the error and can simply invite them again from that menu.
The optional sections
Three collapsed panels sit at the bottom of the form.
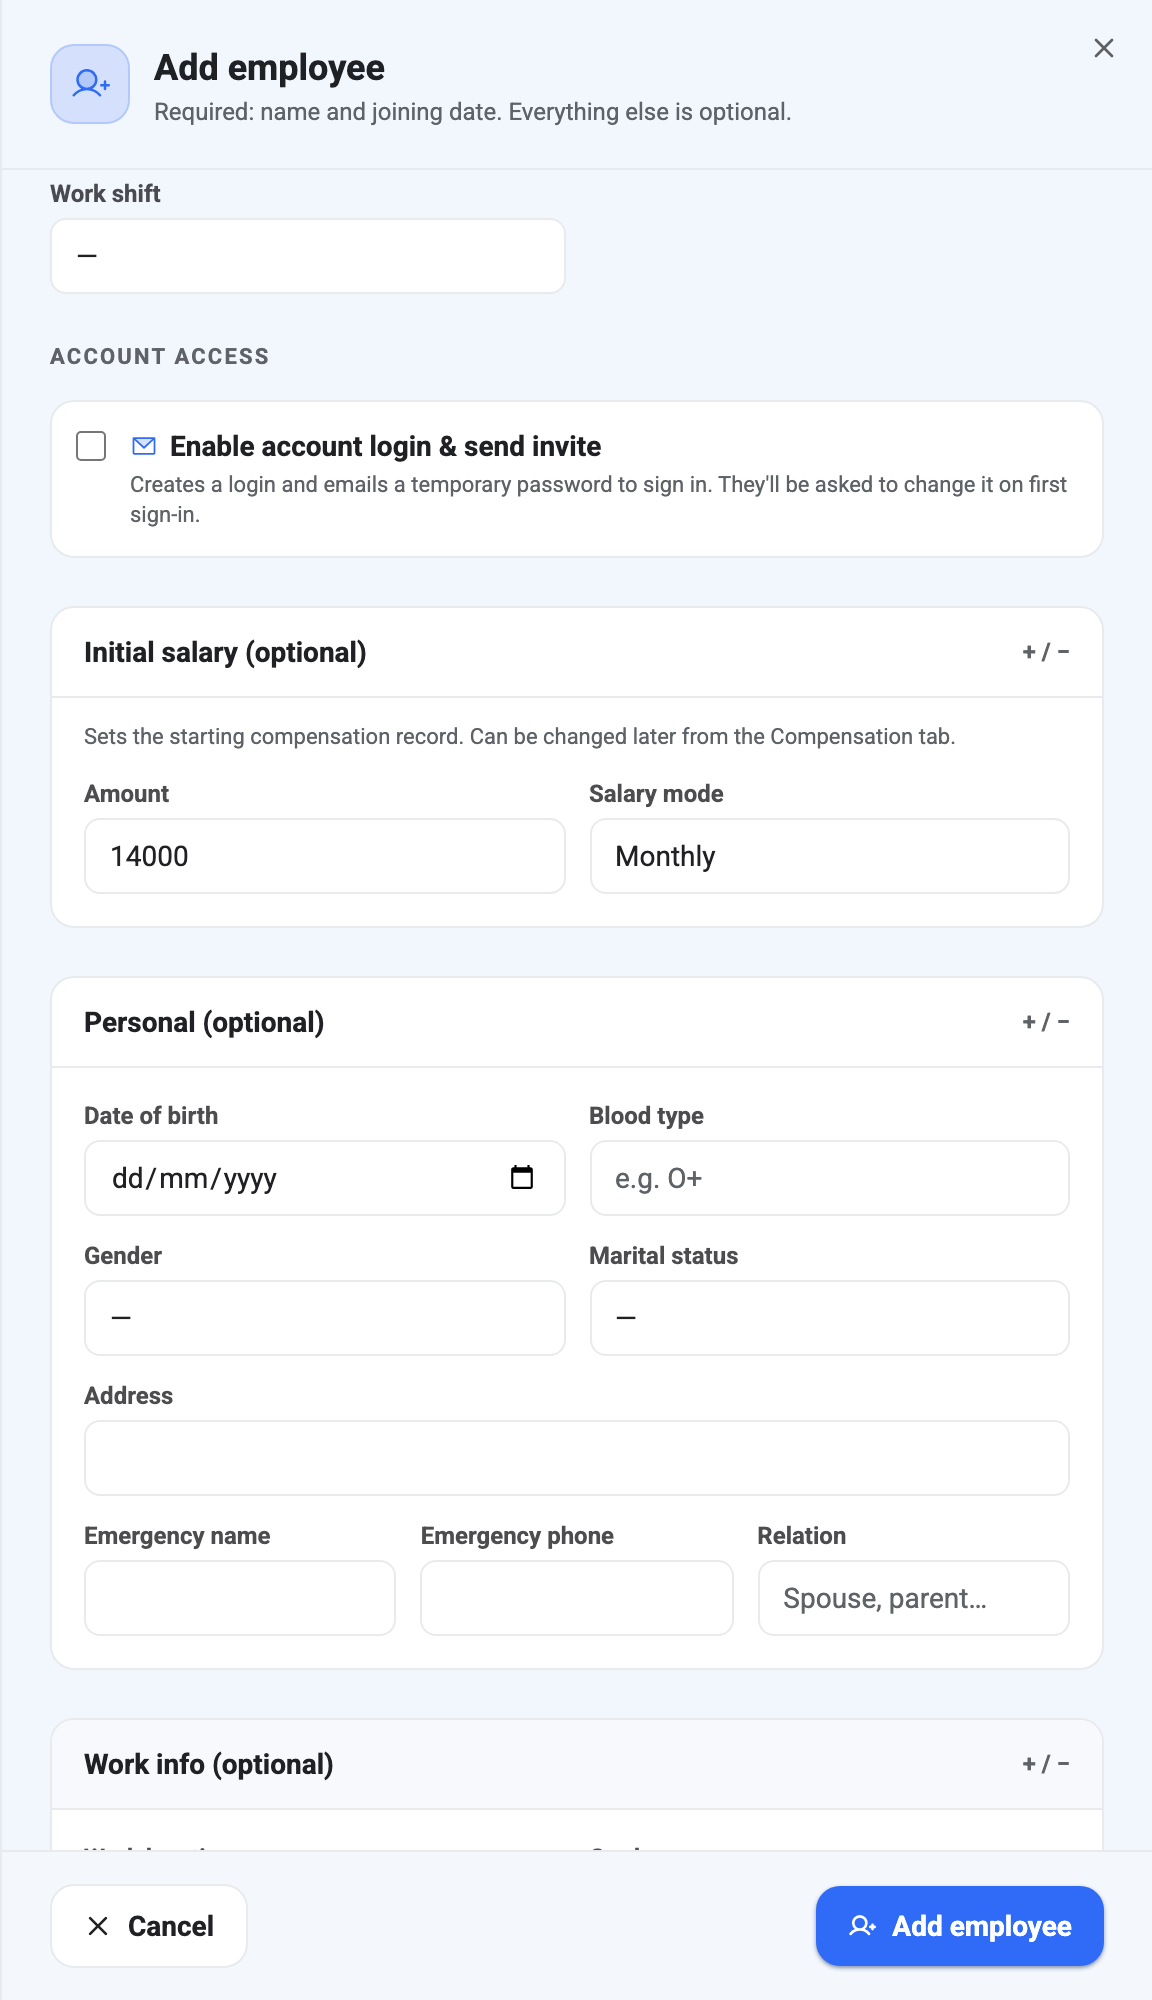
Initial salary writes the person’s starting compensation record, dated to their joining date and labelled as a hire. Setting it here saves a trip, but it is genuinely optional — you can add or revise pay any time from the Compensation tab on their record, and every change is kept as history. Salary mode is how the amount is expressed: Monthly, Weekly, Biweekly or Hourly.
Personal and Work info hold date of birth, blood type, address and the like. None of it drives any behaviour in BeeHR; it is there so the record is a complete picture of a person rather than a payroll row.
When it won’t save
Almost every failed save is one of two things.
An email already in use means someone in this branch already has that address. BeeHR keeps one email per person per branch, which is what lets it map a login back to exactly one employee record. Check whether they were added before, possibly as a leaver — remember that terminated employees are hidden from the list until you tick Include terminated in the filters.
Otherwise, look for the red text under an individual field. The panel doesn’t scroll to the problem for you, so if pressing Add employee seems to do nothing, scroll back up through the form.
After you save
BeeHR drops you straight onto the new person’s record, open on their profile tab, with their generated employee code at the top. From there you can add a photo, bank details, documents and anything else the form deliberately left out — see The Employee Record for what each tab is for.
Note — New employees are created in whichever branch you have selected in the top bar, and that is where they stay. If you add somebody and can’t find them afterwards, check that you’re looking at the same branch you added them in.